Here’s a polished, professional version of your article for your website, formatted for SEO and readability:
🦌 How to Can Deer Meat Using the Raw Pack Method: A Step-by-Step Guide
Canning deer meat is one of the best ways to preserve your venison harvest for long-term storage. Whether you’re using it in stews, casseroles, or simply as a ready-to-go protein, this method creates tender, flavorful meat that’s shelf-stable and always ready to use.
In this guide, we’ll walk you through how to can deer meat safely and effectively using the raw pack method with a pressure canner.

❓ Why Can Deer Meat?
While freezing is a popular option, canning venison has unique advantages:
- No thawing required — just open and heat.
- Shelf-stable for up to 18+ months.
- Rich, savory broth forms naturally in the jar.
- Saves freezer space and is perfect for power-outage preparedness.
🧰 Supplies You’ll Need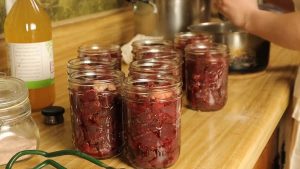
Before getting started, gather these essentials:
- Pressure canner (weighted gauge or dial gauge)
- Canning jars (pint or quart size)
- Two-piece lids (new lids with rings)
- Jar lifter
- Canning funnel
- Lid lifter or fork
- Paper towels
- Apple cider vinegar (for cleaning rims)
- Himalayan salt (optional — for flavor only)
⚠️ Note: Adding salt is optional and for taste only. It does not contribute to preservation and may cloud the broth.
🔪 Preparation Steps
1. Prepare the Jars
Keep jars warm to prevent cracking by:
- Placing in hot water
- Running through a hot dishwasher cycle
- Or keeping in a 200°F oven
2. Prep the Venison
- Cut deer meat into 1-inch cubes.
- Trim away all fat, sinew, and gristle (to prevent spoilage).
- Keep meat chilled until ready to pack.
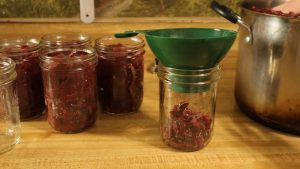
3. Pack the Jars (Raw Pack Method)
- Fill jars with raw venison, leaving 1 inch of headspace.
- (Optional) Add ½ tsp salt per pint or 1 tsp per quart.
- Do not add liquid — the meat will release natural juices during processing.
4. Clean & Seal
- Wipe jar rims with a paper towel dipped in apple cider vinegar to remove grease.
- Apply hot lids and screw bands on fingertip tight.
🔥 Pressure Canning Process
1. Load the Canner
- Place jars on the canner rack.
- Add a few inches of water (don’t submerge the jars).
- Lock the lid in place.
2. Vent the Canner
- Heat the canner and vent steam for 10 full minutes.
- Then place the weight on the vent (or close the petcock if using a dial gauge).
3. Processing Times
- Pints: 75 minutes at 10 lbs pressure
- Quarts: 90 minutes at 10 lbs pressure
- Adjust for altitude as needed per your canner’s instructions.
4. Cool & Store
- Allow canner to cool and depressurize naturally (don’t force open!).
- Remove jars and let sit undisturbed for 12–24 hours on a towel.
- Check that all lids have sealed properly (center should not flex).
- Remove bands and label jars with the date.
🏷️ Storage Tips
- Store in a cool, dark place away from sunlight or heat.
- Properly canned deer meat can last 12–18 months (or longer if sealed and stored well).
- Always inspect for signs of spoilage before using.
✅ Final Thoughts
Canning deer meat is more than just a way to preserve your harvest — it’s a way to enjoy nutritious, ready-to-eat meals year-round. It’s perfect for stews, pot pies, tacos, or even straight out of the jar when you need a protein boost fast.
So go ahead — fill those jars, seal in the flavor, and enjoy your wild harvest for months to come.
🦌 Happy canning and good eatin’!
Would you like a social media caption or MidJourney-style image prompt to match this article for Facebook or Pinterest?