Introduction
After a full year of baking sourdough, I felt pretty confident with my starter routine. Like many home bakers, I had settled into my habits: feed it, watch it bubble, bake bread, repeat. It worked well enough, and I thought I had learned most of the tricks by now. But recently, I came across a small tip that completely changed the way my starter behaves—and the results were incredible. It was a gentle reminder that in baking, you never really stop learning. Whether you’re a beginner or someone with experience, there’s always something new waiting to surprise you. And this tip? It’s worth sharing.
What I Tried and Why
This all began when I read a casual comment online from another baker. They mentioned that stirring your starter again about 30 to 45 minutes after the initial mix could lead to a better rise. At first, it didn’t seem like a big deal—just a second stir? How much could that really change? But I was curious. My starter was doing fine, but who doesn’t want a bit more strength and rise—especially when baking in cooler months? So I decided to give it a try, just to see what would happen. The beauty of sourdough is that even small changes can have a big impact, and I figured it was worth experimenting.
The Stirring Method
Here’s exactly what I did during this little experiment. In a clean jar, I combined 30 grams of mature sourdough starter with 125 grams of warm water (not hot, just enough to take the chill off), and 140 grams of flour. I stirred everything together thoroughly until it was fully mixed—no dry flour bits, no lumps. At this point, I would usually just leave it alone to ferment.
But this time, I set a timer and came back after 45 minutes. By then, the mixture had already started to puff up slightly, and you could see small bubbles beginning to form. I stirred it again—gently but thoroughly. This second stir redistributed the developing gases and gave the flour another chance to absorb water. It also felt smoother as I stirred, almost silkier. I covered the jar loosely with a lid and placed it back on the counter overnight. My kitchen is a bit chilly in the evenings, so I wasn’t expecting anything dramatic—but I was in for a surprise.
The Surprising Results
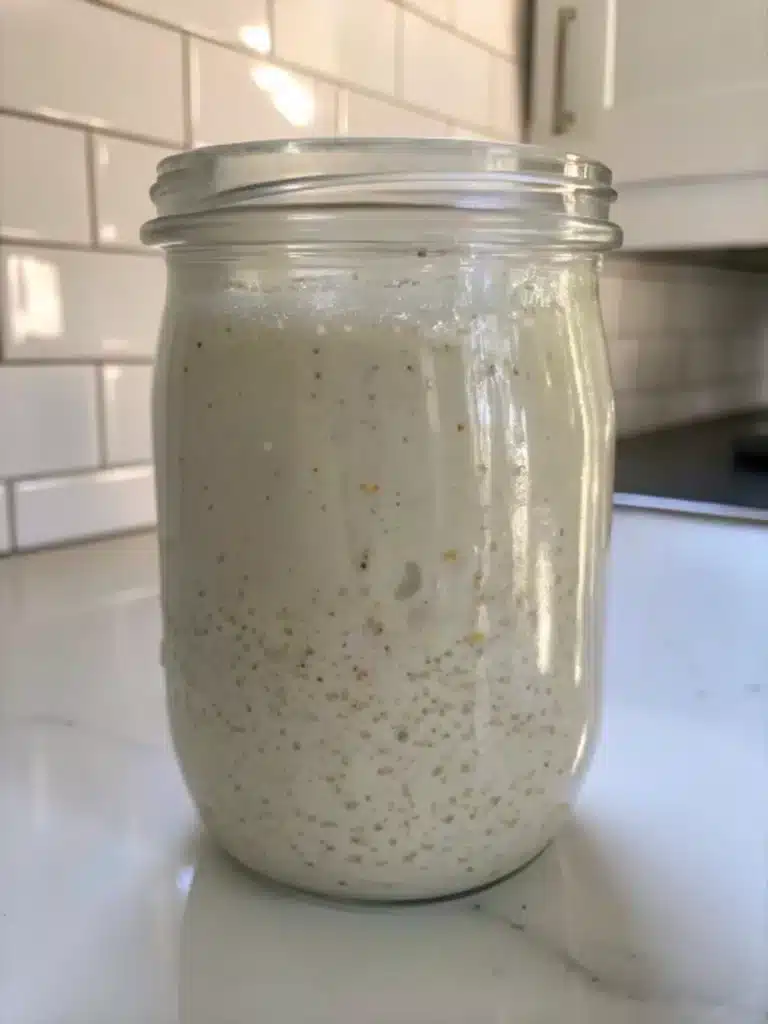
When I checked the jar the next morning, I could hardly believe my eyes. The starter had risen dramatically—at least two inches higher than what I usually get. It had a soft, sponge-like texture with loads of visible bubbles throughout. The surface was domed and airy, and the entire starter looked alive and vibrant. It was as if the mixture had received a little boost of energy from that second stir. What really stood out was how consistent and stable the rise was—even in a cold room. In fact, it was so active it nearly overflowed from the jar. I’ve never had that kind of result from a single feeding before.
Why This Works
There’s a bit of simple science behind why this works. When you stir the starter after it’s had some time to sit, you’re redistributing the natural yeasts and bacteria that begin to settle during fermentation. It’s like giving the mix a little nudge to wake everything up again. You also introduce a bit more air into the mixture, which the yeast loves—it helps them stay active. On top of that, the extra mixing strengthens the gluten structure as the flour continues to hydrate. This means your starter not only rises higher, but it also becomes more elastic and better prepared to support a loaf of bread. It’s a tiny effort with a big payoff.
How It Compares to My Usual Routine
In the past, my routine was simple: mix, cover, and walk away. It worked, but I often noticed inconsistencies—especially in colder weather. Sometimes my starter would rise a lot, other times just a little. I chalked it up to temperature or timing. But after trying this new method, I realized how much more consistent and dependable my starter could be. It no longer felt like I was guessing or hoping it would work. With just one extra stir, I had more control, better rise, and more reliable results. The difference in texture and rise was enough to convince me this should become part of my regular process.
Tips for Cold Kitchens
One of the challenges many home bakers face—especially during fall and winter—is keeping their starter active in a cool kitchen. If your space feels chilly, your starter might slow down or take longer to rise. This second-stir method helps give it an extra boost, but here are some additional ways to help your starter thrive:
Use warm water when feeding. Not hot—just enough to give the starter a head start.
Place your jar in a microwave (turned off) with a mug of hot water to create a warm, draft-free environment.
Wrap the jar in a kitchen towel or place it inside a proofing box or closed cupboard.
You can even set it near the stovetop after cooking, where the surrounding air is naturally warmer.With a little creativity, even a cold kitchen can become sourdough-friendly.
Jar Size and Overflow Prevention
Once I saw how high my starter rose, I realized my usual jar was barely enough to hold it. Overflow isn’t just messy—it can also waste starter and leave you with less to bake with. Here’s what I recommend to prevent that:
Choose a jar that holds at least double the volume of your starter mix. For example, if your starter adds up to around 300 grams, pick a 600 ml or larger jar.
Don’t screw the lid on tightly. Instead, cover it loosely to let gases escape and avoid pressure buildup.
Place the jar on a plate or shallow dish to catch any spillover just in case it gets too active.A little planning goes a long way in keeping your kitchen clean and your starter safe.
Starter FAQs
Can I use different types of flour with this method?Yes! This method works well with all-purpose, bread flour, whole wheat, or even rye. Just be aware that whole grain flours ferment faster, so the rise time may shorten.
What if I forget to stir a second time?That’s perfectly okay. Your starter will still rise—it just might not be quite as strong. The second stir is a helpful bonus, not a rule you must follow every time.
Can I stir it more than twice?You can, especially if you’re feeding it for baking the next day. Just make sure you’re not deflating it too much before using.
How long should I wait after the second stir before baking?Let it continue to rise until it has doubled (or tripled) in volume and looks airy and domed. Depending on temperature, this can take 4–8 hours.
Do I need to use a Weck jar like yours?Nope! Any clean glass or food-safe container with enough room for rising will work just fine.
Conclusion
This tiny change—stirring your sourdough starter again after the first 30 to 45 minutes—has made a big difference in the strength and reliability of my bakes. It’s easy to do, takes just a moment of your time, and the results speak for themselves. Whether you’re baking in a cold kitchen or just looking to give your starter a little extra lift, I highly recommend giving this method a try. Sometimes, the best improvements come from the smallest changes. If you try it out, I’d love to hear how it works for you.